Corgi Buildings Simulated with Bayko
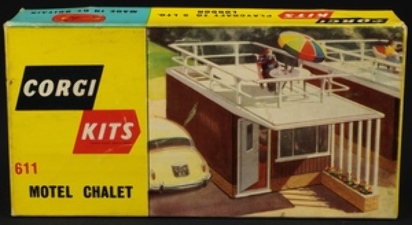
I was browsing an old Corgi Cars catalogue the other day, reminiscing over days gone by when I came across the Corgi Kits. Looking at E-Bay these antique kits in good condition are being offered for silly money, as is pre-WWII Bayko.
This got me to thinking about reproducing these buildings using my Bayko, after all, the scale of Bayko is very close to that of the 1:43 scale cars built by Corgi and Dinky, the cars actually being used to present the Bayko models in advertisements. So taking a second look at the old kits I tried to determine how these could be built using standard Bayko parts and a plan took shape in my head. Why not reproduce all the offered kits using Bayko? My object is to achieve as close a resemblance as possible to the original kits. Unfortunately, this would in some cases call for specialized pieces being made from scratch! This could be achieved by creating the parts with a 3D printer.
So here goes. For those of you interested, I will be showing how to build not just the buildings once displayed in Corgi Toys' catalogue, but also a few others I hope you will find interesting.
Corgi 611 MOTEL CHALET
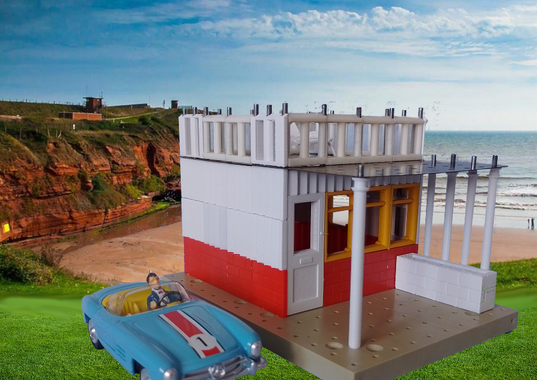
To start off with we will be looking at the Motel/Holiday Chalet. It is quite a simple building, with a ladder leading up to the roof-top sun bathing area. The steps or ladder was originally inside the chalet. This would necessitate cutting a hole in the roof, so the steps are suggested so I do not have to deface a floor. Also taking a closer look at the chalet, there are some differences in the style of some of the parts when compared to standard Bayko parts. The walls appear to be wooden boards built on a brick base. The door has a large window compared to Bayko, and the pillars holding up the roof are thinner, but apart from this I think we can build a passable chalet. We will simply use standard brick parts, with an option using specialized tiles which simulate the wood cladding.
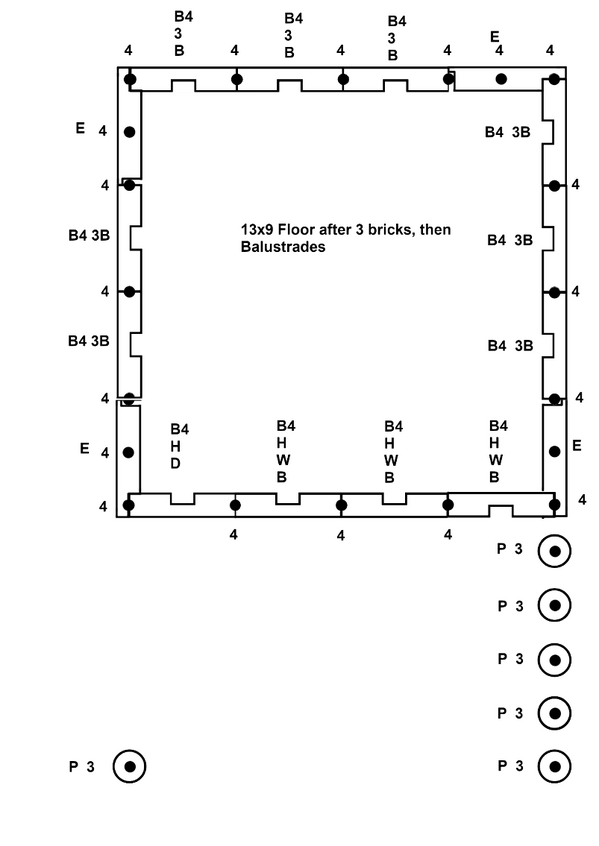
Here is the floor plan:
The chalet fits onto a single base. The chalet has a door and three windows across the front. You can put a window at the rear if you wish. Decorate with a flower box across the pillars.
Parts List:
B12 Base 1
B18 Brick, red 11
B20 Brick, white 16
B30 End Brick, red 8
B32 End Brick, white 4
B36 Half Brick, white 4
B54 No. 3 Brick Rod 6
B56 No. 4 Brick Rod 20
B108 Floor 13x9 1
B130 Pillar, 3-brick 6
B190 Window 3
Specialized Parts
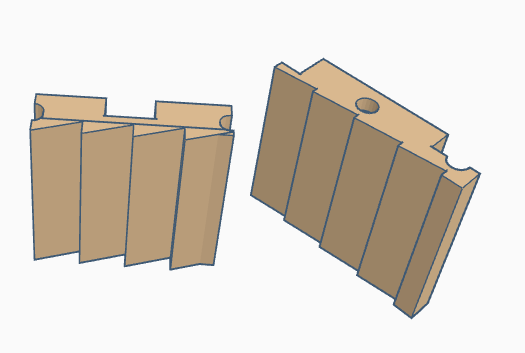
As mentioned above, this model would benefit from parts that are not in the Bayko line, but can be easily produced with a 3d Printer. The picture shows my version of the chalet using parts created with a 3d printer.
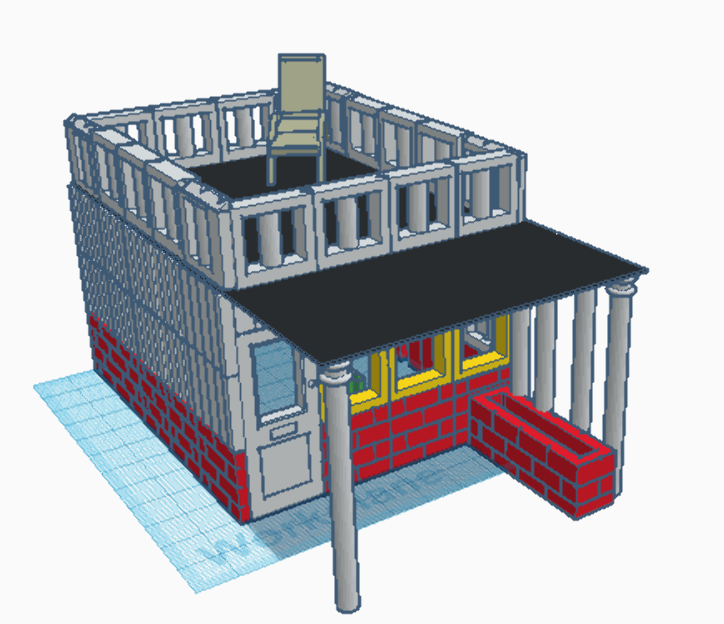
The first layer is made of red bricks, but from the second course up, after some trial and error, I managed to create a tile which simulates feathered boarding (painted white, of course).
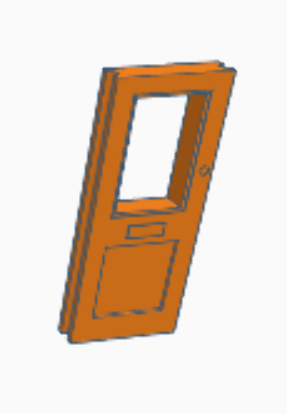
I replaced the front door with one with a larger window.
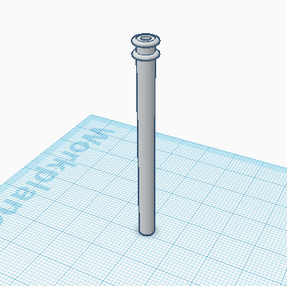
The pillars supporting the overhang are also new, being only about 6mm in diameter.
Standard windows have been used. Once the floor is in place, then the model is topped of with standard balustrades Again, the corners are a special Balustrade End piece not standard in Bayko sets.. An optional special 3D printed planter box by the pillars and a sun lounge on the roof completes our chalet. You could also use a stone planter from Britains Floral Garden sets.
I hope you liked this idea. Why not make several chalets and build yourself a complete motel?